Categories

The Brother 1034D is a fantastic entry-level serger, offering professional finishes for home sewing projects with ease and remarkable consistency․
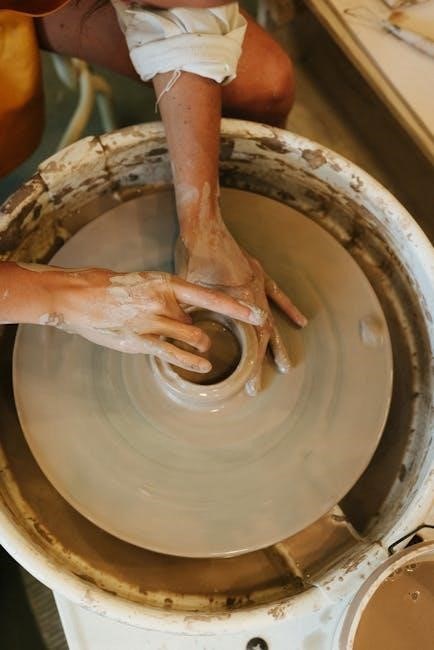
A serger, also known as an overlock machine, simultaneously sews, trims, and finishes raw fabric edges, preventing fraying and creating a professional-looking seam․ Unlike a standard sewing machine, sergers utilize loopers and multiple threads․
Why the Brother 1034D? This model is incredibly popular due to its user-friendly design, making it ideal for beginners․ It’s remarkably affordable without sacrificing quality or functionality․
The 1034D boasts 11 built-in stitch options, adjustable stitch length and width, and differential feed for preventing puckering on stretchy fabrics․ Its ease of threading, combined with its robust construction, makes it a worthwhile investment for any sewing enthusiast․

The Brother 1034D features loopers, needles, presser feet, tension dials, and stitch selectors – each crucial for achieving perfect serged seams consistently․
Loopers (Upper & Lower): These interlock threads to create the overlock stitch․ The upper looper guides the thread over the edge, while the lower looper interlocks beneath, forming a secure seam․
Needles: The needles penetrate the fabric, creating a foundation for the looper threads․ Using the correct needle type is vital for different fabrics․
Presser Foot: Holds the fabric in place during serging, ensuring even feeding․ Different presser feet are available for specialized techniques․
Tension Dials: Control the thread tension, crucial for balanced stitches․ Adjusting these dials is key to preventing looping or puckering․
Stitch Length Dial: Determines the length of the stitches, impacting the seam’s strength and appearance․
Successful serging hinges on correct threading! The Brother 1034D utilizes a color-coded threading system, simplifying the process․ Always refer to the detailed diagrams printed within your machine’s manual – or available online at Brother’s support site․
Each thread path (needle threads, upper and lower looper threads) is assigned a specific color․ Follow these colors meticulously, ensuring the thread passes through all guides and tension discs correctly․
Incorrect threading is the most common cause of serger issues․ Take your time, double-check each step, and don’t hesitate to re-thread if needed․ Visual aids are your best friend!

Before serging, ensure your Brother 1034D is properly prepared; winding the bobbin and correctly threading the loopers and needles are crucial steps․
Winding the bobbin on your Brother 1034D is a straightforward process․ First, place the spool of thread onto the spool pin, securing it with the cap․ Next, guide the thread through the tension disc and then onto the bobbin․
Insert the bobbin onto the bobbin winder spindle, pressing it firmly into place․ Push the bobbin winder lever to the right to engage the winding mechanism․
Gently depress the foot pedal to start winding․ The machine will automatically stop when the bobbin is full․ Remove the bobbin, trim the thread, and you’re ready to thread the serger! Consistent, even winding ensures optimal stitch quality․
Threading the loopers and needles on the Brother 1034D requires patience, but is achievable with practice․ Begin by raising the presser foot․ Follow the numbered threading path indicated in your manual for each looper – upper and lower – and each needle․
Ensure the thread snaps securely into each guide and tension disc․ Use the threader for the needles if needed․
Pull a sufficient length of thread through each eye, approximately 6 inches․ Incorrect threading is a common cause of issues, so double-check each step against the diagram․ Proper threading is crucial for balanced stitches!
Mastering fundamental techniques unlocks the 1034D’s potential․ Explore rolled hems and flatlock stitches to elevate your sewing projects with professional results․
A rolled hem is perfect for lightweight fabrics like chiffon or silk, creating a delicate, finished edge․ With the Brother 1034D, achieving this is surprisingly simple! First, adjust the stitch length to a shorter setting – typically around 1․0 to 1․5․ Then, select the rolled hem setting on your machine; this often involves adjusting the looper settings․
Ensure your fabric is properly aligned before beginning․ Gently guide the fabric edge into the serger foot, allowing the machine to curl the edge as it stitches․ Practice on scrap fabric first to fine-tune the settings and achieve a consistently neat, narrow hem․ A rolled hem adds a professional touch to scarves, napkins, and other delicate items․
Flatlock stitching creates a strong, decorative seam that lies flat – ideal for activewear, baby clothes, or adding unique design elements․ To achieve this with the Brother 1034D, you’ll need to adjust the looper tension․ Loosen the upper looper tension slightly and tighten the lower looper tension․
Place fabric pieces wrong sides together, aligning the edges․ Serging will cause the fabric to naturally pull apart and lay flat․ Experiment with tension adjustments to achieve the desired “flat” appearance․ This technique is incredibly versatile, offering both functionality and visual appeal to your sewing projects․

Explore beyond basics! Mastering differential feed and decorative threads unlocks the Brother 1034D’s full potential for truly customized and professional sewing results․
Differential feed is a powerful feature on the Brother 1034D, controlling fabric movement during serging․ Adjusting this setting prevents stretching or puckering, especially with knit or delicate fabrics․ A higher differential feed (above 1․0) gathers the fabric, ideal for creating ruffles or decorative effects․ Conversely, a lower setting (below 1․0) reduces fabric feed, preventing stretching on loosely woven materials․
Experimentation is key! Start with the default setting of 1․0 and incrementally adjust based on your fabric type and desired outcome․ Observe the fabric as it serges; if it’s stretching, lower the feed․ If it’s puckering, increase it․ Proper differential feed ensures smooth, even seams every time․
The Brother 1034D isn’t limited to standard serger threads! Explore using decorative threads – metallic, variegated, or even woolly nylon – to add unique textures and visual interest to your projects․ When using thicker or novelty threads, reduce the presser foot pressure slightly to prevent strain on the machine․
Test thread combinations on scrap fabric first to ensure compatibility and desired effect; Consider using a contrasting color in the looper for a highlighted edge․ Remember to clean your serger more frequently when using fuzzy or lint-producing threads to maintain optimal performance․

Encountering problems with your Brother 1034D is normal; this section provides solutions for skipped stitches, broken threads, and looping difficulties․
Skipped stitches on the Brother 1034D often indicate a threading issue, a dull needle, or incorrect tension settings․ First, re-thread the loopers and needles, ensuring each thread is properly seated in its guides and tension discs․
Next, replace the needles; even slightly damaged needles can cause inconsistent stitching․ Verify the tension settings are appropriate for your fabric type – lighter fabrics require lower tension, while heavier fabrics need higher tension․
Also, confirm the presser foot is correctly installed and applying even pressure․ Finally, ensure you’re using the correct needle type and size for your chosen fabric․ A proper setup minimizes skipped stitches․
Frequent thread breakage on your Brother 1034D usually points to incorrect threading, excessive tension, or a damaged thread path․ Begin by carefully retracing the threading path for the broken thread, checking for any obstructions or improperly seated threads․
Reduce the tension on the looper or needle causing the breakage; overly tight tension strains the thread; Inspect the thread guides for burrs or rough edges that could be damaging the thread․
Using low-quality or old thread can also contribute to breakage, so switch to a reputable brand․ Finally, ensure the needle is appropriate for the thread weight and fabric type․
Persistent looping, whether on the top or bottom of your fabric, indicates an imbalance in thread tension or improper looper timing on your Brother 1034D․ If loops form on the top, loosen the upper looper tension․ Conversely, loops on the bottom suggest tightening the lower looper tension․
Ensure all threads are correctly threaded and that the presser foot pressure is appropriate for the fabric․ Experiment with slight adjustments to the stitch length and differential feed․
If problems persist, consult the threading diagram and re-thread meticulously, verifying each thread path․

Regular cleaning and oiling are crucial for maintaining your Brother 1034D’s performance and longevity, ensuring smooth operation for years to come․
Consistent cleaning prevents lint and thread buildup, which can significantly impact the 1034D’s performance․ Always unplug the serger before cleaning! Use the provided brush to remove lint from the looper area, needle plates, and feed dogs after each use․ A small vacuum cleaner with a brush attachment can also be helpful for reaching tight spaces․
For deeper cleaning, occasionally use a lint brush or a can of compressed air․ Wipe down the exterior surfaces with a soft, damp cloth․ Never use liquid cleaners inside the machine, as they can damage internal components․ Pay special attention to the tension discs, ensuring they remain free of debris for consistent stitch quality․ Regular cleaning extends the life of your serger!
Proper lubrication is crucial for maintaining the smooth operation of your Brother 1034D․ Use only serger oil – never use sewing machine oil, as it’s too thick․ Locate the oiling points as indicated in your manual; typically, these include the loopers and needle bar mechanisms․
Apply a small drop of oil to each point, then operate the handwheel slowly to distribute the oil․ Wipe away any excess oil to prevent staining fabric․ Oiling frequency depends on usage; generally, oil after every 8 hours of operation, or when you notice increased resistance․ Consistent oiling ensures longevity and prevents wear and tear․

Expand your skills with Brother’s support and vibrant online communities dedicated to the 1034D, offering tutorials and helpful advice․
Brother’s website is your primary resource for comprehensive support regarding the 1034D serger․ You’ll find a dedicated section for this model, featuring a downloadable PDF version of the full owner’s manual․ This manual contains detailed instructions, diagrams, and troubleshooting guides to assist you with every aspect of operation․
Furthermore, the support site offers frequently asked questions (FAQs), helpful videos demonstrating key features, and access to driver updates if needed․ You can also submit support requests directly to Brother’s customer service team for personalized assistance․ Regularly checking this site ensures you have the latest information and solutions for your 1034D․
Beyond the official manual, a wealth of learning resources exists online! YouTube hosts numerous video tutorials demonstrating various techniques with the Brother 1034D, from basic threading to advanced serging projects․ Online sewing forums and Facebook groups dedicated to sergers provide a platform to connect with fellow enthusiasts, ask questions, and share tips․
Websites like Craftsy and CreativeLive offer in-depth courses on serger operation and design․ These communities are invaluable for troubleshooting issues, discovering new applications, and gaining inspiration․ Don’t hesitate to leverage these collaborative spaces to enhance your serging skills!
Always disconnect the power cord before performing maintenance․ Keep fingers away from moving parts, and use the provided tools for optimal safety․
Before operating your Brother 1034D serger, carefully read this entire manual to understand its functions and safety features․ Ensure the machine is placed on a stable, level surface during use․ Never operate the serger if it appears damaged or is malfunctioning in any way․
Keep the serger out of reach of children․ Always disconnect the power cord when threading, changing needles, cleaning, or performing any maintenance․ Avoid wearing loose clothing or jewelry that could become entangled in the moving parts․ Use only genuine Brother accessories and attachments to prevent damage or injury․
Never force any part of the machine․ If you encounter resistance, stop immediately and consult the troubleshooting section of this manual․
Needles are extremely sharp; handle them with utmost care․ Always use a needle designed for sergers and the specific fabric you are sewing․ When replacing needles, ensure the presser foot is raised and the power is off․ Dispose of used needles responsibly in a designated sharps container․
Never sew over needles or attempt to catch up if a needle breaks․ This can cause further damage to the machine and increase the risk of injury․ If a needle breaks, immediately stop the machine, disconnect the power, and carefully remove the broken pieces․
Always use needle protectors when storing or transporting needles․
Here are answers to common questions regarding the Brother 1034D serger, addressing setup, troubleshooting, and achieving optimal sewing results consistently․
Q: Can the 1034D handle various fabric types? A: Absolutely! This serger excels with knits, wovens, fleece, and even lightweight denim․ Adjusting the stitch length and differential feed is key․
Q: Is the 1034D difficult for a beginner? A: While there’s a learning curve, many find it user-friendly․ The included manual and online resources are incredibly helpful․ Practice makes perfect!
Q: What does the differential feed do? A: It prevents stretching or puckering of fabrics․ Higher settings gather fabric, lower settings flatten it, ensuring professional-looking seams․
Q: Where can I find replacement parts? A: Brother’s website and many online sewing parts retailers carry replacements for needles, loopers, and other components․