Categories

PowerFlex 70 wiring demands precision; this guide details safe, effective installation for optimal performance and longevity of your variable frequency drive system.
The PowerFlex 70 is a highly versatile and compact family of variable frequency drives (VFDs) manufactured by Rockwell Automation (Allen-Bradley). Designed for general-purpose motor control, it provides robust performance and a wide range of features suitable for diverse industrial applications.
This drive excels in controlling AC induction motors, offering precise speed and torque regulation. It’s known for its ease of use, thanks to its embedded Human Interface Module (HIM) and intuitive programming capabilities. The PowerFlex 70 supports various communication protocols, enabling seamless integration into larger automation systems.
Available in multiple voltage classes and power ratings, it caters to applications ranging from simple pump and fan control to more complex machinery. Its compact footprint and cost-effectiveness make it a popular choice for both new installations and retrofits, delivering significant energy savings and process improvements.
The PowerFlex 70’s adaptability makes it ideal for numerous industrial applications. Commonly, it’s used for controlling pumps, fans, and conveyors, optimizing energy usage and process efficiency. In material handling, it precisely manages conveyor speeds and positioning, enhancing throughput.
The drive also excels in applications like mixers and agitators, providing consistent and controlled mixing processes. Packaging machinery benefits from its precise speed control, ensuring accurate product handling. Furthermore, it’s frequently employed in HVAC systems for fan and pump control, contributing to energy conservation.
Its robust design allows for use in light-duty machine tools and other general motion control applications. The PowerFlex 70’s versatility extends to water and wastewater treatment plants, where it regulates pump operations, and in various OEM applications requiring reliable motor control.
Always disconnect power before wiring. Qualified personnel only should install and maintain this equipment, following all local and national electrical codes.
Critical safety warnings must be heeded during PowerFlex 70 installation and maintenance. High voltages are present, posing a severe electrocution risk; always ensure the drive is completely de-energized and locked out/tagged out before accessing any internal components or wiring. Capacitors within the drive can retain a dangerous charge even after power removal – discharge them properly using a suitable resistor before touching any parts.
Improper grounding can lead to hazardous touch currents and equipment malfunction. Follow grounding instructions meticulously. Never operate the drive with damaged wiring or enclosures. Regularly inspect all connections for tightness and integrity. Be aware of potential electromagnetic interference (EMI) and take appropriate shielding measures. Failure to observe these warnings could result in serious injury or death, as well as damage to the equipment. Always consult a qualified electrician.
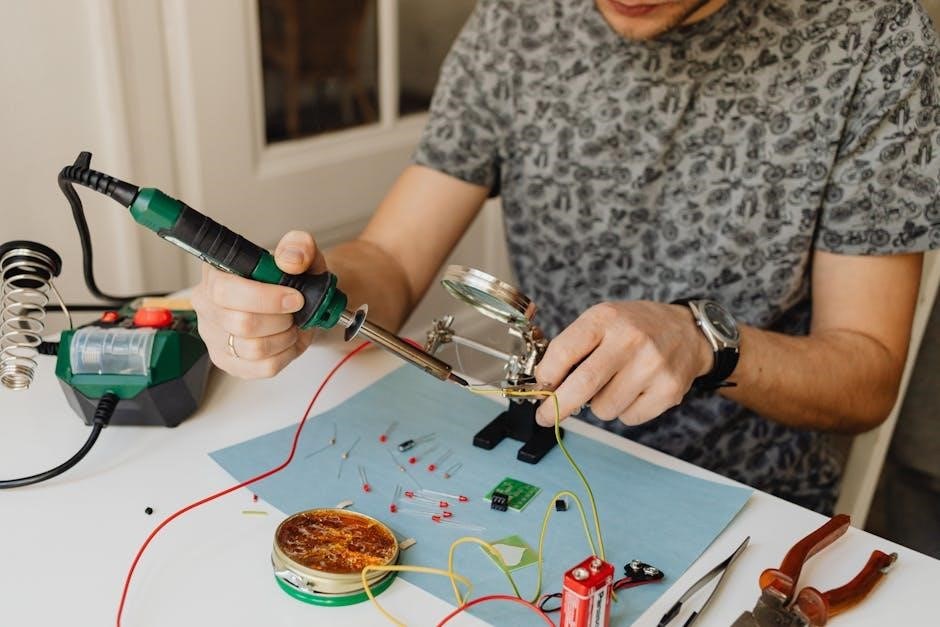
Successful PowerFlex 70 wiring necessitates specific tools and materials. You’ll require a properly insulated screwdriver set, wire strippers, and crimping tools for secure connections. A digital multimeter is essential for voltage and continuity checks. Torque screwdrivers are crucial for tightening terminals to the manufacturer’s specifications, preventing loose connections and overheating.
Necessary materials include appropriately sized power and control wiring, wire connectors (ferrules recommended), cable glands for proper enclosure sealing, and grounding straps. Consider a wire labeling system for clear identification. Depending on the application, you may also need conduit, DIN rails, and mounting hardware. Always use UL-listed or equivalent components. Having a spare fuse of the correct rating is also highly recommended for quick troubleshooting.
The PowerFlex 70 nameplate is a critical resource for correct wiring and configuration. Carefully review the input voltage range; connecting outside this range will damage the drive. Note the full load amps (FLA) rating – this dictates wire gauge selection for both input and output circuits. Pay attention to the horsepower (HP) or kilowatt (kW) rating to ensure compatibility with your motor.
The nameplate also displays the drive’s serial number, firmware version, and other important identifiers for support and documentation. Understand the enclosure type (IP rating) for environmental suitability. Input and output phase information (single or three-phase) is clearly indicated. Ignoring this information can lead to incorrect wiring, potentially causing drive failure or safety hazards. Always cross-reference the nameplate data with your motor specifications.

Control wiring establishes communication between the PowerFlex 70 and external devices, enabling start/stop, speed control, and feedback signal integration.
Understanding the control signal wiring diagram is crucial for proper PowerFlex 70 operation. Typically, digital inputs (DI) are used for start, stop, forward, reverse, and enable functions. These are connected to the drive’s terminal block, often using 24V DC signals. Analog inputs (AI) allow for variable speed control, commonly utilizing 4-20mA or 0-10V signals.
Digital outputs (DO) provide status feedback, such as drive running or fault conditions, which can be wired to PLCs or other control systems. Common wiring includes connecting DI1 to Start, DI2 to Stop, and an analog input for a potentiometer controlling speed. Always refer to the specific PowerFlex 70 manual for your model, as terminal numbers and default configurations can vary. Proper grounding and shielding are essential to minimize noise interference and ensure reliable signal transmission. A clear, labeled diagram simplifies troubleshooting and maintenance.
Configuring digital inputs on the PowerFlex 70 is done through drive parameters, defining each input’s function. Common configurations include Start, Stop, Forward, Reverse, Enable, and Fault Reset; Parameters allow selection of sourcing (positive logic) or sinking (negative logic) input types, matching the control signal’s polarity.
Input filtering can be adjusted to reject noise and prevent spurious triggering. Parameter N1-xx (where xx is the input number) controls the input function assignment. Carefully consider the desired behavior when assigning functions; for example, a momentary pulse to Start may require a latching configuration. Utilize the drive’s built-in diagnostics to verify correct input signal reception. Incorrect configuration can lead to unexpected drive behavior or prevent proper operation. Always document your digital input assignments for future reference and troubleshooting.
Analog inputs on the PowerFlex 70 provide a means for variable control, typically for speed reference, ramp rate adjustment, or process variable feedback. Configuration involves scaling the input signal (0-10V, 4-20mA, or 0-20mA) to the desired drive parameter range. Parameters P1-xx (where xx is the input number) define the input type, scaling, and filtering. Proper scaling ensures the drive responds predictably to the analog signal.
Filtering is crucial to minimize noise and achieve smooth control. Adjust the filtering time constant to balance responsiveness and stability. Consider using a high-resolution analog input for precise control applications. Incorrect scaling or filtering can result in erratic drive behavior or inaccurate process control. Thoroughly test the analog input configuration with a calibrated signal source to verify correct operation and responsiveness.
Mains power connection to the PowerFlex 70 requires strict adherence to local and national electrical codes for safety and reliable operation consistently.
Connecting a PowerFlex 70 to a single-phase 230V power source involves careful attention to wiring specifics. First, ensure the incoming power supply is properly fused with a time-delay fuse of the appropriate amperage rating, as indicated on the drive’s nameplate. Connect the Line (L1) wire to the L terminal on the drive, and the Neutral (N) wire to the N terminal.
Crucially, the Ground (PE) wire must be connected to the dedicated ground terminal – this is paramount for safety. Double-check all connections for tightness and proper insulation. Incorrect wiring can lead to drive failure or, more seriously, electrical shock. Verify the input voltage matches the drive’s configuration before applying power. A properly wired single-phase connection provides a stable and safe power source for the PowerFlex 70’s operation.

Wiring a PowerFlex 70 for three-phase 460V/575V operation requires meticulous adherence to electrical codes and the drive’s documentation. Begin by verifying the drive is configured for the correct input voltage. Connect the three-phase lines (L1, L2, L3) to the corresponding T1, T2, and T3 terminals on the drive.
Importantly, always connect the ground (PE) wire to the dedicated ground terminal for safety. Utilize appropriately sized wire and ensure all connections are securely tightened. Fuses or circuit breakers should be installed on each phase to protect against overcurrents, matching the drive’s nameplate specifications. Incorrect phase rotation can cause the motor to run in the wrong direction; verify proper rotation before connecting the load. A secure and correct three-phase connection is vital for reliable performance.
Implementing line reactors with a PowerFlex 70 significantly mitigates harmonic distortion reflected back onto the power system, improving power quality and reducing stress on upstream equipment. Reactors are particularly beneficial in installations with multiple drives or sensitive loads. Selection depends on the drive’s kVA rating and the existing system impedance.
When installing, connect the line reactor between the incoming power source and the drive’s input terminals (T1, T2, T3). Ensure the reactor is sized correctly to avoid voltage drops or resonance issues. Proper grounding of the reactor is crucial for safety. Consult the PowerFlex 70 manual and relevant engineering guidelines for specific reactor recommendations and installation best practices. Ignoring these considerations can lead to drive malfunction or system instability.

Connecting the motor to the PowerFlex 70 requires careful attention to phase sequence and proper grounding for reliable operation and safety assurance.
Establishing correct motor lead connections – typically labeled U, V, and W on both the drive and the motor – is crucial for proper rotation and preventing damage. Before connecting, always verify the motor’s voltage and amperage ratings match the drive’s specifications. Incorrect connections can lead to immediate failure.
Typically, you’ll connect the motor leads directly to the output terminals of the PowerFlex 70, ensuring secure connections using appropriate wire size and torque specifications. If the motor requires a brake, connect it to the designated braking resistor terminals.
Important Considerations: Double-check the phase sequence. Swapping any two leads will cause the motor to rotate in the opposite direction. If the motor rotates incorrectly, simply swap any two of the three motor leads. Ensure all connections are tight to prevent arcing and overheating. Use a torque screwdriver to achieve the manufacturer’s recommended torque values.
Output filters, often required for compliance with electromagnetic compatibility (EMC) standards, mitigate high-frequency noise generated by the PowerFlex 70 during operation. Installation typically involves placing the filter between the drive’s output and the motor terminals. Always consult local EMC regulations to determine if a filter is necessary for your application.
When installing, ensure the filter is properly grounded to the drive’s grounding terminal. Use appropriately sized conductors for the filter connections, following the filter manufacturer’s guidelines. Incorrect grounding or undersized conductors can compromise the filter’s effectiveness.
Critical Notes: Verify the filter’s voltage and current ratings match the drive and motor specifications. Improper filter selection can lead to overheating or failure. Regularly inspect filter connections for tightness and corrosion. A properly installed output filter significantly reduces electromagnetic interference.
Braking resistors dissipate energy generated during regenerative braking, preventing drive overvoltage faults. Wiring involves connecting the resistor to the designated braking terminals (typically labeled BRK+ and BRK-) on the PowerFlex 70 drive. Always ensure the resistor’s wattage and resistance are compatible with the drive’s specifications and the application’s braking demands.
Use appropriately sized wiring for the braking resistor connections, considering the potential current flow; Maintain short and direct wiring runs to minimize inductance and voltage drop. Proper grounding of the braking resistor enclosure is crucial for safety and performance.
Important Considerations: Monitor the resistor’s temperature during operation; excessive heat indicates insufficient wattage. Regularly inspect connections for tightness and corrosion. Incorrect resistor selection or wiring can damage the drive or compromise braking performance.

PowerFlex 70 supports diverse communication; proper wiring enables seamless integration with PLCs, HMIs, and industrial networks for enhanced control capabilities.
EtherNet/IP connectivity on the PowerFlex 70 utilizes a standard RJ45 connector for straightforward network integration. Ensure a Cat5e or Cat6 cable is used for reliable data transmission, minimizing signal interference and maximizing network performance. When wiring, observe proper termination procedures, adhering to T568A or T568B standards to guarantee consistent connectivity.
The drive supports both auto-MDI/MDI-X, eliminating the need for crossover cables in most applications. However, verify network compatibility if utilizing older switches or devices. Assign a unique IP address to the drive within your network’s addressing scheme, avoiding conflicts with other devices. Proper IP configuration is crucial for successful communication and remote access. Remember to configure the subnet mask and gateway address accordingly.
Shielded cables are recommended in electrically noisy environments to protect against electromagnetic interference (EMI). Grounding the cable shield properly is essential for effective noise reduction. Always consult the PowerFlex 70 EtherNet/IP configuration manual for detailed setup instructions and troubleshooting tips.
DeviceNet communication with the PowerFlex 70 employs a Mini-DIN connector, requiring a DeviceNet cable with the appropriate mating connector. Wiring necessitates careful attention to polarity; ensure correct connection of the power, data+, data-, and shield wires. Typically, DeviceNet utilizes a trunkline topology with drop cables to each device. Proper termination resistors (121 ohms) are crucial at both ends of the trunkline to prevent signal reflections and ensure reliable communication.
Cable length limitations apply; total trunk length should not exceed 500 meters. Utilize thicker gauge wire for longer runs to minimize voltage drop. The PowerFlex 70 requires a DeviceNet network address to be configured, ensuring uniqueness within the network. Consult the drive’s parameter list for address assignment procedures.
Shielded cabling is highly recommended, especially in industrial environments, to mitigate noise interference. Proper grounding of the cable shield is vital for effective noise suppression. Refer to the PowerFlex 70 DeviceNet manual for detailed configuration and troubleshooting guidance.
RS-485 communication with the PowerFlex 70 utilizes a terminal block connection, requiring a twisted-pair cable for data transmission. Wiring demands attention to polarity; connect Data A (Data+), Data B (Data-), and Ground correctly. A termination resistor (typically 120 ohms) should be installed at both ends of the communication line to minimize signal reflections and ensure reliable data transfer, particularly over longer distances.
Maximum cable length is generally 1200 meters (4000 feet), but performance can degrade with increased length. Shielded cable is recommended in noisy environments to reduce interference. The PowerFlex 70 requires configuration of communication parameters like baud rate, parity, and stop bits to match the master device.
Ensure proper grounding to avoid ground loops. Refer to the drive’s programming manual for detailed parameter settings and troubleshooting procedures related to serial communication.

Addressing wiring faults requires systematic checks; verifying connections, voltage levels, and parameter settings swiftly restores operation and minimizes downtime effectively.
If the PowerFlex 70 displays no signs of life, begin by verifying the main power supply. First, confirm that the input voltage matches the drive’s nameplate rating; Incorrect voltage is a frequent cause of this issue. Second, check the input fuses or circuit breakers; a blown fuse or tripped breaker will immediately cut power. Ensure replacements are the correct amperage and type.
Next, inspect all wiring connections to the drive’s input terminals (L1/T1, L2/T2, L3/T3, and Ground). Loose connections or damaged wires can prevent power from reaching the drive. Use a multimeter to confirm voltage presence at these terminals. Also, examine the drive’s DC bus capacitors; if they show no voltage after applying power, a more significant internal fault may exist, requiring professional service.
Finally, review the drive’s control wiring; although seemingly unrelated, some control circuits can inhibit power-up. A safety interlock or emergency stop signal could be active. Consult the drive’s manual for specific troubleshooting steps related to control circuit faults.
When the PowerFlex 70 displays “Ready” but the motor fails to run, systematically check several key areas. Initially, verify the motor wiring connections (U, V, W) at both the drive and motor terminals. Loose or incorrect connections are common culprits. Then, confirm the motor nameplate data matches the drive’s motor parameters; mismatched values can prevent proper operation.
Next, examine the drive’s output frequency and voltage settings. Ensure they are appropriate for the motor’s specifications and the desired application. Also, check for any active fault codes; these provide valuable clues about the underlying problem. Consult the drive’s manual for fault code descriptions and remedies.
Finally, investigate potential mechanical issues, such as a jammed load or a faulty motor itself. Disconnect the motor from the drive and briefly apply power directly to the motor (with appropriate safety precautions) to rule out a motor failure. A multimeter can verify motor winding resistance.