Categories
This comprehensive guide details every component of the iScrub 20, ensuring efficient maintenance and swift repairs for optimal cleaning performance.
The Chariot iScrub 20 is a robust, self-contained automatic scrubber designed for efficient cleaning of medium-sized areas. It’s a versatile machine, ideal for supermarkets, schools, gyms, and various commercial facilities.
Featuring a 20-inch cleaning path, the iScrub 20 combines scrubbing and vacuuming in a single pass, significantly reducing cleaning time and labor costs. Its intuitive controls and durable construction ensure ease of use and long-term reliability.
This scrubber boasts adjustable brush pressure and solution flow, allowing customization for different floor types and soil conditions. The compact design enhances maneuverability in tight spaces, while the onboard solution and recovery tanks minimize downtime for refills and emptying.
A dedicated parts manual is crucial for maintaining the Chariot iScrub 20’s peak performance and extending its operational lifespan. It empowers users to accurately identify and replace worn or damaged components, minimizing downtime and repair costs.
Without a detailed manual, identifying the correct part can be challenging, leading to incorrect replacements and further machine issues. This manual provides clear diagrams and part numbers, ensuring precise ordering and efficient repairs.
Furthermore, it supports preventative maintenance by outlining recommended replacement schedules for key components, preventing unexpected breakdowns and maximizing the return on your investment in the iScrub 20.

This manual is logically organized into sections, covering safety, components, parts lists, maintenance, troubleshooting, and ordering – for easy navigation.
Prioritizing safety is paramount when working with the iScrub 20. This section details crucial precautions to prevent injury during maintenance and part replacement. Always disconnect the power source – both electrical and battery – before commencing any work. Wear appropriate personal protective equipment (PPE), including safety glasses and gloves, to shield against potential hazards like chemical splashes or moving parts.
Never attempt repairs beyond your skill level; improper handling can lead to machine malfunction or personal harm. Be mindful of pinch points and rotating brushes. Read and understand all warning labels affixed to the machine. This section also outlines emergency procedures and contact information for reporting incidents. Ignoring these safety guidelines voids warranties and compromises operator well-being.
The iScrub 20 is a walk-behind scrubber designed for efficient hard floor cleaning. This section provides a detailed overview of the machine’s primary systems. Key components include the robust chassis, the solution and recovery tanks, the brush deck assembly – housing the scrubbing brushes – and the powerful vacuum system.
We’ll also cover the control panel, detailing its functions for adjusting cleaning parameters. Understanding the interplay between these components is crucial for effective maintenance. Diagrams illustrate the location of each part, aiding in identification. Familiarization with these elements will streamline troubleshooting and part replacement procedures, maximizing the iScrub 20’s operational lifespan.
This section forms the core of the manual, presenting a meticulously organized parts list for the iScrub 20. Each component is listed with a unique part number, detailed description, and quantity required. Accompanying the list are exploded view diagrams, visually breaking down the machine’s assembly.
These diagrams are essential for identifying parts and understanding their relationship to one another. Clear labeling and cross-referencing between the list and diagrams ensure accurate part identification. Users can quickly locate specific components and their corresponding part numbers for ordering replacements. This section is designed for ease of use, promoting efficient maintenance and repair operations.

Explore in-depth analyses of crucial iScrub 20 systems – brushes, tanks, vacuums, and controls – for comprehensive understanding and effective servicing.
The iScrub 20’s brush system is central to its cleaning power. This section details each component, from the brush deck and rotating brushes to the brush skirts and drive components. Detailed diagrams illustrate the assembly, allowing for easy identification of parts like brush heads, side brushes, and retaining clips.
Understanding the function of each part is crucial for maintaining optimal scrubbing performance. We cover brush motor specifications, belt replacements, and skirt adjustments. Proper maintenance extends brush life and ensures consistent cleaning results. Pay close attention to wear indicators and recommended replacement schedules to avoid damage to the machine or compromised cleaning quality. This section also highlights compatible brush types for various floor surfaces.
The iScrub 20’s solution system efficiently distributes cleaning solution for effective floor scrubbing. This section provides a detailed breakdown of the solution tank, fill strainer, solution pump, and associated hoses and nozzles. Exploded views clearly show the arrangement of each component, aiding in identification during maintenance or repair.
We cover troubleshooting common issues like clogs and leaks, alongside instructions for inspecting and replacing worn hoses and filters. Proper solution concentration is vital for optimal cleaning and machine longevity, so we detail recommended dilution ratios. Regular inspection of the pump and nozzles ensures consistent solution delivery. This section also includes part numbers for replacement components, ensuring a quick return to operation.
The iScrub 20’s vacuum system is crucial for removing dirty water, leaving floors clean and dry. This section details the vacuum motor, squeegee assembly, vacuum hoses, and recovery tank. Detailed diagrams illustrate the precise placement of each component, simplifying identification during servicing.
We address common issues like reduced suction and water streaking, providing guidance on inspecting and replacing worn squeegee blades and vacuum hoses. Filter maintenance is also covered, as a clogged filter significantly impacts performance. Part numbers for all components are included for easy ordering. Regular checks of the vacuum motor and hoses are recommended to prevent downtime and maintain optimal cleaning results.
The iScrub 20’s control panel manages all machine functions, from brush speed to solution flow. This section details the panel’s components – switches, indicators, and the circuit board – alongside the wiring harness and battery system. Clear diagrams showcase the electrical connections, aiding in troubleshooting and repair.
We cover common electrical issues like blown fuses, faulty switches, and battery charging problems. Safety is paramount; always disconnect power before working on the electrical system. Part numbers for all electrical components are provided for accurate replacements. Regular inspection of wiring for damage and corrosion is vital for preventing malfunctions and ensuring safe operation.

Efficiently pinpointing required components is crucial; this section guides users through the parts list and diagrams for quick identification and ordering.
The parts list is organized systematically, typically by assembly or functional group. Begin by identifying the major section related to the part you need – for example, ‘Brush System’, ‘Vacuum System’, or ‘Electrical Components’. Within each section, parts are usually listed numerically or alphabetically.
Pay close attention to the ‘Key’ or ‘Index’ column, which corresponds directly to the numbered callouts on the exploded view diagrams. Each line provides a detailed description of the part, its part number, and often, the quantity used on the machine.
Carefully compare the visual representation in the diagram with the actual part to confirm you’ve located the correct item; Note any specific variations or options listed, as these can affect compatibility.
Chariot part numbers are not random; they contain crucial information about the component. Typically, a Chariot part number is a combination of letters and numbers. The initial digits often indicate the part’s category or assembly. Subsequent numbers specify the exact part within that category, including variations in size, material, or revision level.
Understanding these codes ensures you order the correct replacement. A slight difference in a number can mean incompatibility. Always double-check the entire part number against the manual and the part you are replacing.
Some codes may also indicate superseded parts – meaning an updated version is now used. The manual will usually note these replacements, guiding you to the current, correct part number.
The diagrams within this manual aren’t just visual aids; they are integral to identifying parts. Each component shown in a diagram is assigned a reference number. This number directly corresponds to an entry in the parts list.
To locate a specific part, first find it on the diagram. Note its reference number. Then, locate that same number in the parts list. The parts list will provide the part number, description, and quantity needed.
This cross-referencing system minimizes errors and ensures accurate ordering. Always verify both the diagram and the parts list before requesting a replacement.

Regular upkeep extends the iScrub 20’s lifespan. This section details routine maintenance, filter changes, and replacing worn components efficiently.
Maintaining clean filters is crucial for the iScrub 20’s vacuum performance and overall cleaning effectiveness. This guide provides step-by-step instructions for replacing both the pre-filter and the HEPA filter. First, always disconnect the power before beginning. Locate the filter compartment, typically accessed from the rear of the machine. Remove the old pre-filter, noting its orientation for correct re-installation.
Dispose of the used filter responsibly. Next, remove the HEPA filter, again observing its direction. Insert the new HEPA filter, ensuring a tight seal. Replace the pre-filter, aligning it properly. Close and secure the filter compartment. Regular filter changes – ideally every 50 operating hours or monthly – prevent motor strain and maintain optimal suction power, contributing to a consistently clean floor surface.
Consistent brush performance is vital for effective scrubbing. The iScrub 20 utilizes durable brushes, but wear is inevitable depending on usage and surface type. Regularly inspect brushes for frayed bristles, uneven wear, or damage. Always disconnect power before any brush maintenance. To replace a brush, release the brush deck retaining mechanism – consult the ‘Machine Overview’ section for specifics.
Remove the worn brush and align the new brush with the drive shaft. Ensure a secure fit before re-engaging the retaining mechanism. Proper brush installation prevents slippage and ensures consistent contact with the floor. Replace brushes in pairs for balanced wear and optimal cleaning results. Monitor brush wear proactively to maintain scrubbing efficiency and prevent potential motor strain.
Maintaining the integrity of the iScrub 20’s hoses and tubing is crucial for solution delivery and vacuum functionality. Regularly inspect all hoses and tubing for cracks, leaks, kinks, or signs of wear. Always depressurize the system and disconnect power before inspection or replacement. To replace a hose or tubing section, identify the correct part using the ‘Parts List’ and diagrams.
Loosen clamps securing the damaged section and carefully remove it. Attach the new component, ensuring a snug fit and secure clamp placement. Proper sealing prevents solution loss and maintains vacuum performance. Verify connections before restoring power and resuming operation. Prompt replacement of damaged hoses and tubing prevents further system damage and ensures optimal cleaning results.
Effectively diagnose issues by cross-referencing symptoms with parts diagrams, pinpointing faulty components, and utilizing repair guidance within this manual.
Accurately pinpointing malfunctioning parts is crucial for efficient repairs. Begin by carefully observing the iScrub 20’s performance – note any unusual noises, reduced cleaning effectiveness, or error messages displayed on the control panel.
Then, consult the parts manual’s diagrams to locate the corresponding components. Systematically check each part associated with the observed issue. Look for visible signs of damage, such as cracks, wear, or corrosion.
Utilize a multimeter to test electrical components for continuity and voltage. For mechanical parts, assess for smooth operation and proper alignment. The manual’s detailed illustrations will aid in identifying specific failure points within each assembly, streamlining the diagnostic process and minimizing downtime.
This parts manual extends beyond mere component identification; it’s a valuable repair resource. Detailed exploded views illustrate assembly and disassembly procedures, guiding you through complex repairs step-by-step.
Pay close attention to torque specifications and recommended tools for each fastener, preventing damage during reassembly. The manual often includes troubleshooting flowcharts, helping to narrow down potential causes for specific issues.
Furthermore, it details proper lubrication points and intervals, contributing to long-term machine health. Always prioritize safety – refer to the safety section before commencing any repair work. Following these guidelines ensures effective and reliable iScrub 20 maintenance.

Securing genuine Chariot iScrub 20 parts is crucial for maintaining performance and warranty validity; explore authorized channels for reliable sourcing.
Chariot maintains a robust network of authorized dealers and suppliers dedicated to providing genuine iScrub 20 parts and exceptional customer service. These partners are fully trained on the intricacies of the machine and can offer expert advice on selecting the correct components for your specific needs.
Locating an authorized dealer is simple – visit the official Chariot website and utilize the dealer locator tool, entering your location to find the nearest provider. Alternatively, contacting Chariot’s customer support team directly will connect you with a trusted supplier. Purchasing through authorized channels guarantees part quality, warranty support, and access to the latest revisions. Beware of unauthorized sellers offering potentially counterfeit or substandard parts.
For convenient and efficient parts procurement, Chariot offers a dedicated online parts ordering portal. This platform provides 24/7 access to the complete iScrub 20 parts catalog, complete with detailed diagrams and part numbers.
Navigating the online store is intuitive; simply search by part number, component name, or utilize the interactive machine diagrams to pinpoint the required item. Secure payment options and streamlined checkout processes ensure a hassle-free experience. Registered users benefit from order tracking, saved addresses, and exclusive promotions. Before finalizing your order, double-check part compatibility and quantity to avoid delays.
Ensuring accurate part information is crucial for a successful order and efficient repair. When contacting dealers or ordering online, always have the iScrub 20’s serial number readily available. This uniquely identifies your machine’s configuration and ensures compatibility.
Clearly communicate the precise part name, part number (as listed in the manual), and a detailed description of the component. If possible, provide a photograph of the faulty part. Avoid using vague terms; be specific about size, color, and any unique features. Accurate information minimizes errors, reduces return times, and gets your iScrub 20 back in operation quickly.

Always prioritize safety; disconnect power and wear appropriate protection. Incorrect part replacement can cause damage or injury – proceed with caution!
Before initiating any part replacement on your Chariot iScrub 20, completely disconnect all power sources. This is a non-negotiable safety step to prevent electrical shock and potential damage to the machine’s sensitive components. First, turn off the main power switch, typically located on the control panel.
Next, if the iScrub 20 is corded, unplug it from the electrical outlet. For battery-powered models, disconnect the battery pack – refer to the machine overview section for battery location.
Double-check that no power indicators are illuminated. A simple test is to attempt to activate the machine; it should remain completely unresponsive. Ignoring this crucial step could lead to severe consequences, so verify power disconnection before proceeding with any maintenance or repair work.
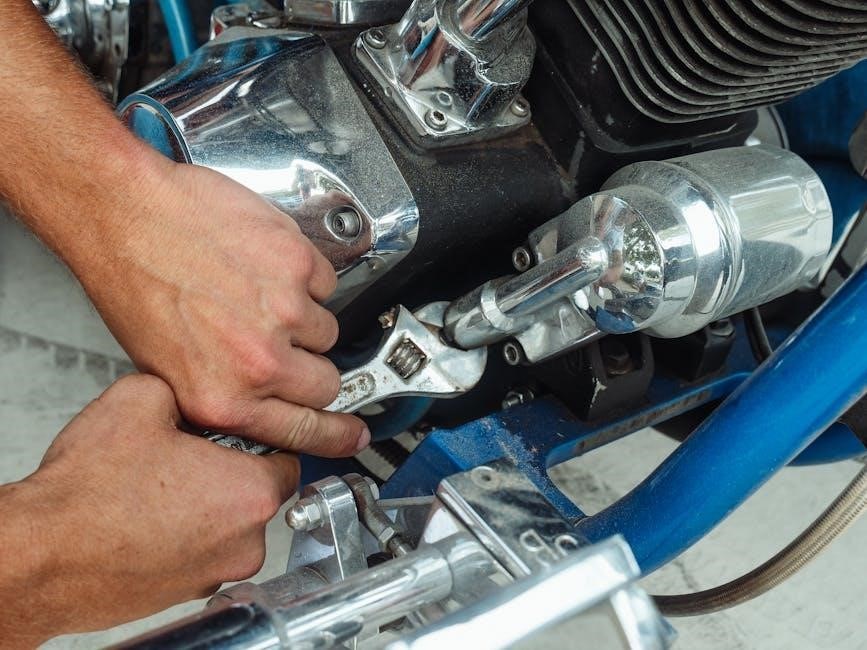
Employing the correct tools is paramount when replacing parts on your Chariot iScrub 20. Utilizing incorrect tools can damage components, void warranties, and create unsafe working conditions. Always refer to the parts list and diagrams to identify the specific fasteners and connections involved in the replacement process.
A standard toolkit should include a set of screwdrivers (Phillips and flathead), wrenches, pliers, and potentially specialized tools like torque wrenches for precise tightening. Avoid using excessive force; let the tool do the work.
Protect sensitive surfaces with appropriate padding or cloths to prevent scratches. Never modify tools or use them for unintended purposes. Prioritize quality tools for a safe and efficient repair.
Chariot continually improves its documentation; regularly check for updated parts manuals online to ensure you have the most accurate information available.
To guarantee you’re working with the most current information, routinely verify the version date of your iScrub 20 parts manual. Visit the official Chariot website – specifically the support or downloads section – and navigate to the iScrub 20 product page.
Compare the version number listed online with the one printed on your physical manual or the digital file you possess. If a newer version exists, download it immediately. Pay attention to revision notes, often included with updates, detailing changes and additions.
Consider bookmarking the iScrub 20 support page for easy access to future updates and revisions, ensuring your maintenance and repair procedures remain accurate and effective.
Should you encounter difficulties locating specific parts, interpreting diagrams, or require clarification regarding the iScrub 20 parts manual, don’t hesitate to reach out to Chariot’s dedicated support team. Several avenues are available for assistance.
You can access their support portal on the official Chariot website, submit a detailed inquiry via email, or connect with a representative through their live chat feature during business hours. A dedicated phone line is also provided for immediate assistance.
When contacting support, have your machine’s serial number and the relevant part number readily available to expedite the process and ensure accurate guidance.