Categories
This guide details everything you need to know about preparing a delicious Marie Callender’s Dutch Apple Pie, from oven settings to serving suggestions․
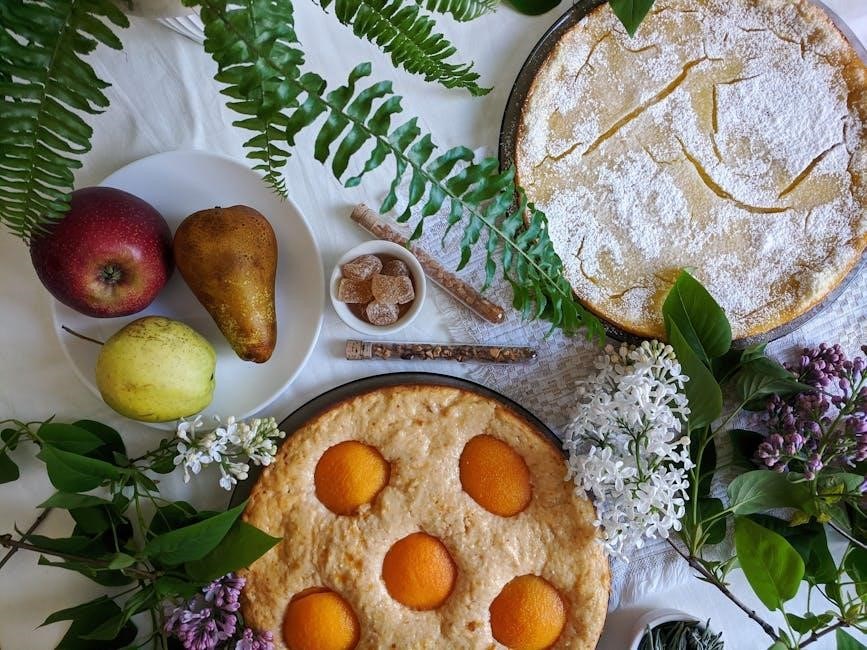
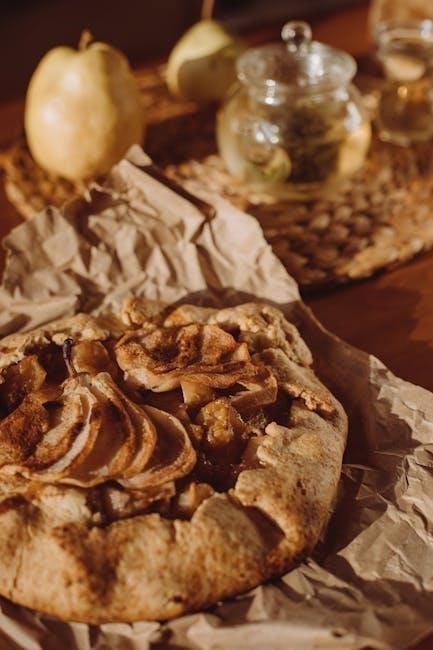
Marie Callender’s Dutch Apple Pie is a beloved classic, renowned for its comforting flavors and convenient preparation․ This frozen pie offers a delightful taste of homemade goodness without the extensive baking effort․ It’s a staple in many households, perfect for holiday gatherings, cozy nights in, or simply satisfying a sweet craving․
The appeal lies in its generous apple filling, subtly spiced and topped with a crumbly, buttery Dutch streusel․ This guide will walk you through everything you need to know to bake this pie to perfection, ensuring a golden-brown crust and a warm, bubbling filling․ We’ll cover thawing options, baking instructions, and even serving suggestions to elevate your pie experience․
Marie Callender’s Dutch Apple Pie distinguishes itself through a harmonious blend of quality ingredients and a time-honored recipe․ Unlike some pies with overly sweet or artificial flavors, this one delivers a genuine apple taste, enhanced by warm spices like cinnamon and nutmeg․ The Dutch crumb topping provides a delightful textural contrast to the tender apples, creating a satisfying bite every time․
Its convenience is also a major draw – a high-quality pie ready to bake, eliminating the need for extensive preparation․ This makes it ideal for both experienced bakers and those seeking a simple dessert solution․ The consistently positive customer feedback and enduring popularity are testaments to its exceptional quality and comforting appeal․
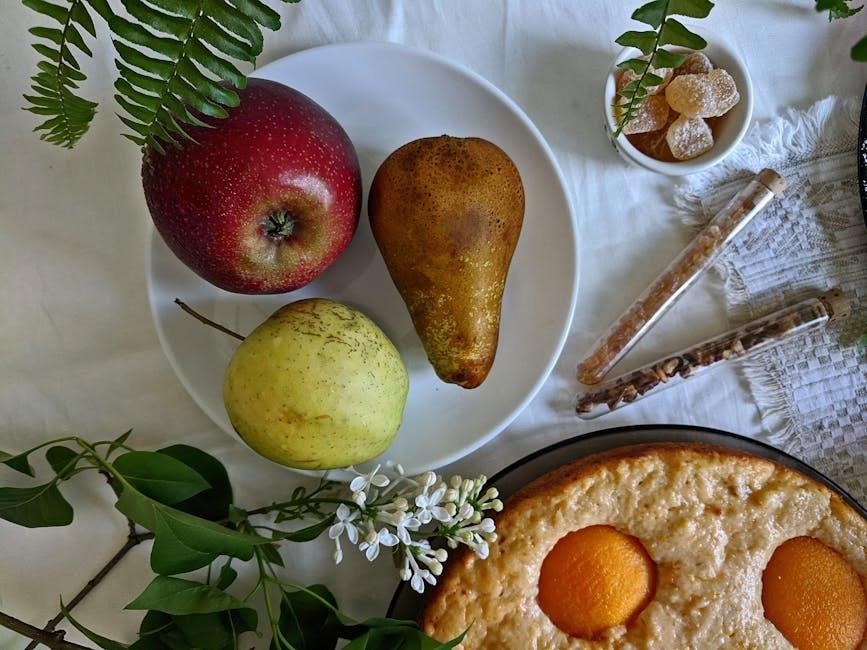
Marie Callender’s Dutch Apple Pie boasts a flavor profile deeply rooted in comforting, traditional tastes․ The foundation is a medley of tart and sweet apples – typically a blend of varieties – providing a balanced fruitiness․ Warm spices, prominently cinnamon and a hint of nutmeg, infuse the filling with cozy aromas and flavors․ The Dutch crumb topping, buttery and slightly sweet, introduces a delightful textural element and complements the apples beautifully․
It’s a flavor experience that evokes feelings of home-baked goodness, avoiding excessive sweetness and focusing on the natural taste of the apples and spices․ This classic combination makes it a universally appealing dessert, perfect for any occasion․
For decades, Marie Callender’s has cultivated a strong reputation for delivering high-quality, comforting desserts, and their Dutch Apple Pie is a prime example․ The brand consistently emphasizes using real ingredients, including genuine butter and carefully selected apples, contributing to a superior taste and texture․ This commitment extends to their baking processes, aiming for a homemade feel in every bite․
Consumers frequently praise the generous filling, the perfectly crumbly topping, and the overall satisfying experience․ Marie Callender’s dedication to quality has solidified its position as a trusted name in frozen desserts, making their Dutch Apple Pie a beloved classic․
Upon receiving your Marie Callender’s Dutch Apple Pie, begin with a careful unboxing․ Gently remove the pie from the packaging, avoiding any forceful actions that could compromise the integrity of the crust or topping․ Visually inspect the box for any signs of damage during shipping, such as dents or punctures․
Once unpacked, examine the pie itself․ Look for any obvious signs of freezer burn, which appears as discolored patches on the surface․ Ensure the pie is fully frozen and feels solid to the touch․ A properly frozen pie will maintain its shape and quality during baking․
Before proceeding, meticulously check the pie’s packaging for any breaches in the seal․ A compromised seal can lead to freezer burn and affect the pie’s overall quality․ Inspect all edges and corners of the box and the plastic wrapping around the pie itself․
If the seal is broken or appears tampered with, it’s best to contact the retailer or Marie Callender’s customer service․ Also, examine the pie’s surface for any cracks or distortions in the crust or topping, indicating potential damage during transport․ A solid, intact pie ensures optimal baking results and a delightful dessert experience․
Marie Callender’s Dutch Apple Pie consists of two primary components: the apple filling encased within a flaky crust, and the signature Dutch crumb topping․ The crust provides a sturdy base and delightful texture, while the apple filling offers a sweet and tart flavor․
The Dutch topping, a generous layer of buttery, crumbly streusel, is what truly sets this pie apart․ Familiarize yourself with these elements; understanding their composition helps anticipate baking behavior․ Note the distribution of the topping – it should be evenly spread for consistent browning and texture․ Recognizing these components ensures a successful and satisfying baking outcome․
Before baking your Marie Callender’s Dutch Apple Pie, proper oven preparation is crucial for even cooking and optimal results․ Begin by ensuring your oven is clean and free of any lingering odors that might affect the pie’s flavor․ Remove any racks or baking stones that aren’t needed․
Next, position the oven rack – we’ll detail the ideal placement shortly․ Preheating is absolutely essential; a fully preheated oven guarantees the crust bakes to a golden-brown perfection and the filling bubbles enticingly․ Allow sufficient time for the oven to reach the correct temperature before introducing the pie․
Marie Callender’s Dutch Apple Pie is designed to bake best at a moderate oven temperature of 375°F (190°C)․ This temperature strikes a balance, allowing the crust to become beautifully golden and crisp while ensuring the apple filling cooks through completely and develops a delightful, bubbly consistency․
Avoid baking at higher temperatures, as this can lead to a burnt crust before the filling is adequately heated․ Conversely, lower temperatures may result in a soggy bottom crust․ Consistent temperature is key; avoid opening the oven door frequently during baking to maintain even heat distribution and prevent temperature fluctuations․
For optimal results with your Marie Callender’s Dutch Apple Pie, position the oven rack in the center of the oven․ This central location ensures that the pie receives heat from all directions, promoting even cooking of both the crust and the apple filling․
Avoid placing the pie on the top or bottom rack, as these positions can lead to uneven baking – a burnt top or an undercooked bottom․ Utilizing the center rack maximizes heat circulation, guaranteeing a consistently golden-brown crust and a thoroughly heated, bubbly apple interior․ Proper rack placement is a simple step with a significant impact on the final product!
Begin by preheating your oven to 375°F (190°C)․ Carefully remove the pie from its packaging and place it directly onto a baking sheet – this helps catch any potential spills․ Bake the frozen pie for approximately 60-75 minutes․ If you’ve thawed the pie beforehand, reduce the baking time to 45-50 minutes․
Throughout the baking process, monitor the pie closely․ The crust should be golden brown, and the filling should be bubbling․ A knife inserted into the center should meet minimal resistance․ Let cool completely before serving for the best flavor and texture!
Proper oven preheating is crucial for achieving a perfectly baked Marie Callender’s Dutch Apple Pie․ Set your oven temperature to 375°F (190°C)․ Allow sufficient time for the oven to reach the set temperature – typically around 15-20 minutes․ Using an oven thermometer is recommended to ensure accuracy, as oven calibrations can vary․
A fully preheated oven guarantees even heat distribution, resulting in a golden-brown crust and a bubbly, thoroughly heated filling․ Avoid opening the oven door frequently during preheating, as this can cause temperature fluctuations and impact the baking process․
Baking time for your Marie Callender’s Dutch Apple Pie depends on whether it’s frozen or thawed․ For a frozen pie, bake for 65-75 minutes․ Ensure the pie is heated through, with a bubbling filling and a golden-brown, crispy topping․ If baking from thawed, reduce the baking time to 50-60 minutes․
Always check for doneness using visual cues (see next section)․ Baking times are estimates and can vary based on your oven․ It’s better to slightly overbake than underbake, ensuring a safe and enjoyable dessert experience․
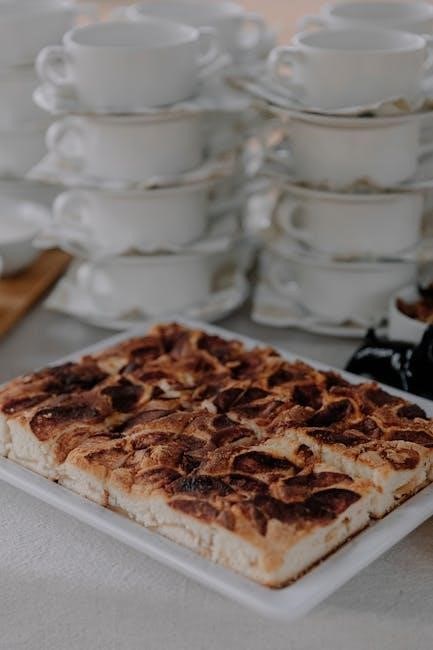
Determining when your Marie Callender’s Dutch Apple Pie is perfectly baked relies on observing key visual cues․ The filling should be bubbling vigorously, especially around the edges, indicating it’s heated through․ The crust needs to be golden brown and firm to the touch – avoid a pale or soggy appearance․
The Dutch crumb topping should also be golden brown and delightfully crispy․ Gently insert a knife into the center; if it meets minimal resistance, the pie is ready․ If needed, continue baking in 5-minute increments, checking frequently․
While Marie Callender’s Dutch Apple Pie can be baked from frozen, thawing can sometimes lead to a more evenly heated result․ For refrigerator thawing, allow the pie to sit in the refrigerator for 24-48 hours, depending on your appliance’s temperature․ This method preserves texture best․
Countertop thawing is faster, taking approximately 3-4 hours, but requires closer monitoring to prevent the pie from becoming overly soft or starting to cook unevenly․ Never thaw at room temperature for extended periods due to food safety concerns․
For optimal results, allow 24 to 48 hours for complete thawing in the refrigerator․ Place the frozen pie on a baking sheet or in a large container to catch any potential drips․ This prevents cross-contamination and simplifies cleanup․
Ensure the pie remains consistently cold throughout the thawing process; avoid temperature fluctuations․ Once thawed, the pie should be baked promptly, ideally within 24 hours, to maintain its quality and prevent bacterial growth․ Do not refreeze a thawed pie․
While possible, countertop thawing is not recommended due to food safety concerns․ The outer layers of the pie will warm up considerably before the center thaws, creating a breeding ground for bacteria․ If countertop thawing is unavoidable, it should only be done for a maximum of two hours․
Monitor the pie closely and bake it immediately after any noticeable thawing occurs․ Never leave a pie thawing at room temperature for extended periods․ Prioritize refrigerator thawing for a safer and more evenly thawed product, preserving both flavor and quality․
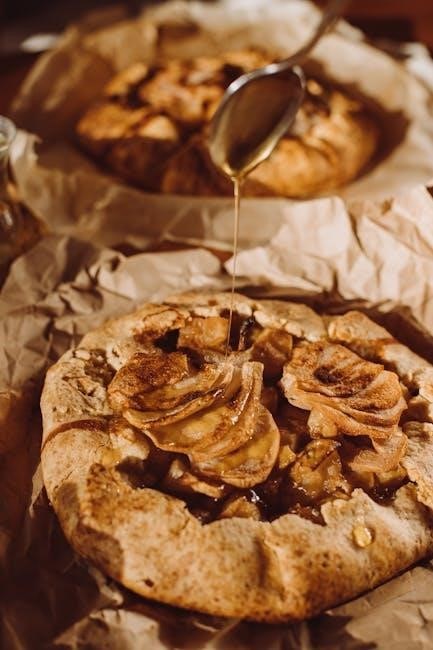
Marie Callender’s Dutch Apple Pie is delightful on its own, but truly shines when paired with complementary flavors․ For a classic experience, serve a warm slice with a generous scoop of premium vanilla ice cream, allowing the cold cream to melt slightly into the warm apple filling․
Alternatively, a dollop of freshly whipped cream provides a lighter, equally satisfying accompaniment․ Beverage pairings include a robust cup of coffee, a soothing herbal tea, or a glass of cold milk to balance the sweetness․ Enjoy!
Elevate your Marie Callender’s Dutch Apple Pie experience with these time-honored pairings․ Vanilla ice cream is the quintessential companion – its cool, creamy texture contrasts beautifully with the warm, spiced apples and crumbly topping․ Opt for a high-quality vanilla bean ice cream for the most pronounced flavor․
If you prefer a lighter touch, freshly whipped cream is an excellent choice․ Ensure it’s lightly sweetened and has a firm peak to hold its shape atop the pie․ Both options create a harmonious blend of textures and tastes, enhancing the overall enjoyment․
Selecting the right beverage can perfectly complement the flavors of your Marie Callender’s Dutch Apple Pie․ A steaming mug of coffee, particularly a medium-roast blend, provides a robust counterpoint to the pie’s sweetness and spice․ Black coffee or a splash of cream are both excellent choices․
For tea lovers, a warm cup of black tea, like English Breakfast, or a spiced chai offers a comforting pairing․ Alternatively, a glass of cold milk – whole or 2% – provides a cool, creamy contrast․ Consider your personal preference to create the ideal dessert experience!
Proper storage ensures your Marie Callender’s Dutch Apple Pie remains fresh and delicious․ Leftover pie should be refrigerated promptly, ideally within two hours of serving․ Store it in an airtight container or tightly wrap the pie with plastic wrap to prevent drying․ Refrigerated pie is best consumed within 3-4 days for optimal flavor and texture․
For longer storage, freezing is a viable option․ Wrap the pie securely in plastic wrap, then in aluminum foil, or place it in a freezer-safe container․ Frozen pie can last up to two months, though quality may slightly diminish over time․
To maintain freshness, promptly refrigerate any remaining Marie Callender’s Dutch Apple Pie․ Within two hours of serving, transfer leftover slices or the entire pie to an airtight container․ If an airtight container isn’t available, tightly wrap the pie with plastic wrap, ensuring all exposed surfaces are covered to prevent drying and absorption of refrigerator odors․
Refrigerated pie will generally maintain its best quality for 3 to 4 days․ While still safe to eat after this timeframe, the crust may soften and the filling could lose some of its initial vibrancy․
For longer-term preservation, Marie Callender’s Dutch Apple Pie can be successfully frozen․ Allow the pie to cool completely before freezing․ Wrap it tightly in several layers of plastic wrap, followed by a layer of aluminum foil, or place it inside a freezer-safe airtight container․
Properly frozen, the pie can retain good quality for up to 2-3 months․ When ready to enjoy, thaw overnight in the refrigerator before reheating․ Note that the texture of the crust may slightly change after freezing, becoming a bit more delicate․
Even with careful baking, occasional issues can arise․ A soggy crust often results from insufficient oven temperature or baking time; ensure your oven is properly preheated and consider placing the pie on a baking sheet․
A burnt topping indicates the oven temperature might be too high or the baking time too long․ Reduce the temperature slightly or cover the pie loosely with foil during the latter part of baking․ If the filling bubbles excessively, a baking sheet placed below can catch any spills․
A soggy bottom crust is a frequent concern with fruit pies․ This typically happens due to moisture from the filling seeping into the crust before it fully bakes․ To prevent this, ensure the oven is thoroughly preheated․ Baking the pie on a preheated baking sheet provides bottom heat, aiding crisping․
Consider brushing the bottom crust with a lightly beaten egg white before adding the filling; this creates a moisture barrier․ Avoid overfilling the pie, as excess filling can contribute to sogginess․ Finally, allowing the pie to cool completely before slicing helps the filling set and prevents a soggy slice․
A beautifully golden-brown topping is desired, but burning is easily achieved! If the topping begins to darken too quickly, immediately tent the pie loosely with aluminum foil․ This shields the topping from direct heat while allowing the filling to continue baking․
Reducing the oven temperature by 25°F (approximately 15°C) for the last 15-20 minutes can also help․ Regularly monitor the pie, especially during the final stages of baking․ Remember, every oven is different, so adjustments may be necessary․ A slightly underbaked filling is preferable to a burnt topping!