Categories

Discover effortless baking with your West Bend bread maker! This guide‚ updated December 26‚ 2025‚ provides detailed instructions‚ from setup to advanced techniques‚ ensuring perfect loaves every time.
Your West Bend bread maker is designed for convenient‚ automated bread baking‚ simplifying the process for both novice and experienced bakers. Familiarizing yourself with its core functions is key to achieving consistent results. The machine expertly handles kneading‚ rising‚ and baking‚ all within a single appliance.
Recent West Seattle community events‚ reported as late as December 19‚ 2025‚ highlight the importance of local resources and reliable tools – much like your bread maker! Understanding its capabilities allows you to explore various recipes‚ from basic loaves to more complex creations. This guide will walk you through each step‚ ensuring you unlock the full potential of your West Bend appliance and enjoy fresh‚ homemade bread with ease.
West Bend offers several bread maker models‚ each with slightly varying features and capacities. While core functionality remains consistent across the range‚ understanding your specific model is crucial. Check the model number‚ typically located on the appliance’s base‚ to access tailored resources. Compatibility with ingredients is generally broad‚ but certain models may perform optimally with specific flour types or yeast brands.
Like the diverse offerings at West Seattle’s Summer Fest (July 9‚ 2025)‚ West Bend caters to different baking preferences. Ensure your chosen recipes align with your machine’s capabilities. Refer to your model’s instruction manual for detailed compatibility information and recommended settings for best results‚ maximizing your baking experience.
Before your first loaf‚ proper setup is essential. Carefully unpack all components‚ verifying everything listed in the manual is present. Position the bread maker on a stable‚ level surface‚ ensuring adequate ventilation – avoiding potential issues like those reported near Solstice Park (Dec 3‚ 2025). Thoroughly clean the kneading paddle and baking pan with warm‚ soapy water‚ then dry completely.
Like preparing for a West Seattle event‚ such as the Joiner meeting (Nov 8‚ 2025)‚ preparation is key. A preliminary run‚ without ingredients‚ can eliminate any manufacturing odors. This initial cycle helps familiarize you with the machine’s operation and ensures optimal performance for your first baking adventure.
Upon receiving your West Bend bread maker‚ carefully open the packaging and lay out all included items. Cross-reference the contents with the parts list in the instruction manual. You should find the bread maker unit itself‚ a non-stick baking pan‚ a kneading paddle‚ and potentially measuring cups/spoons.
Inspect each component for any shipping damage – dents‚ scratches‚ or broken parts. Similar to checking inventory at a West Seattle sale (Jun 14‚ 2025)‚ ensure everything is in perfect condition. Retain the original packaging for potential returns or warranty claims. A thorough check now prevents issues later‚ ensuring a smooth baking experience.
Before your inaugural bake‚ a meticulous cleaning is essential. Remove the baking pan and kneading paddle from the bread maker. Wash both components with warm‚ soapy water; avoid abrasive cleaners that could damage the non-stick coating‚ much like preserving items at a West Seattle business sale (Nov 3‚ 2025);
Wipe down the interior of the bread maker unit with a damp cloth. Do not immerse the unit in water. Ensure all surfaces are completely dry before reassembling. This initial cleaning removes any manufacturing residue and guarantees a fresh start for your baking adventures. Like preparing for the West Seattle Summer Fest (Jul 9‚ 2025)‚ preparation is key!

Achieving consistently excellent bread relies on precise ingredient selection and measurement. Use high-quality bread flour for optimal gluten development‚ crucial for structure. Different flours yield varied results; experimentation is encouraged! Yeast viability is paramount – ensure it’s fresh and properly activated‚ similar to ensuring a successful event like the West Seattle Joiner (Nov 8‚ 2025).
Liquid temperature significantly impacts yeast activity. Lukewarm water (around 105-115°F) is ideal. Accurate measurements are non-negotiable; use measuring cups and spoons specifically designed for baking. Following these guidelines‚ like the careful planning of a West Seattle holiday open house (Jul 17‚ 2025)‚ will maximize your baking success.
Bread flour‚ with its higher protein content‚ develops robust gluten‚ resulting in a chewy‚ structured loaf – ideal for most bread maker recipes. All-purpose flour can be substituted‚ but may yield a slightly softer texture. Whole wheat flour adds a nutty flavor and increased nutritional value‚ but requires more liquid due to its absorbency‚ much like adapting to events like the West Seattle Summer Fest (July 9‚ 2025).
Rye flour contributes a distinctive taste and denser crumb. Experimenting with flour blends allows for customized flavor profiles. Remember‚ flour age impacts performance; older flour may require adjustments. Consistent results‚ like the reliable updates from West Seattle Blog (Dec 19‚ 2025)‚ depend on understanding your flour’s characteristics.
Active dry yeast and instant yeast are commonly used. Instant yeast can be added directly to dry ingredients‚ simplifying the process‚ similar to the convenience of the West Seattle Brake Service Sale (June 14‚ 2025). Active dry yeast requires proofing – dissolving in warm water (105-115°F) with a pinch of sugar – to verify viability. Look for bubbles or foam‚ indicating active yeast.
Expired yeast won’t activate properly‚ leading to flat bread. Proper temperature is crucial; too hot kills the yeast‚ too cold hinders activation. Consider the timing‚ like the West Duwamish Greenbelt Hike (May 17‚ 2025)‚ for optimal results. Always check the expiration date and store yeast in an airtight container.
Accurate liquid measurement is vital for bread maker success. Use a liquid measuring cup‚ reading at eye level‚ ensuring precision – much like the detailed reporting from West Seattle Blog (various dates‚ 2025). Water temperature significantly impacts yeast activity. Warm water (105-115°F) activates yeast‚ while colder liquids slow the process.

Too hot water kills the yeast‚ resulting in a failed rise. Consider the ambient temperature; a cooler kitchen may require slightly warmer liquid. Milk can be substituted for water‚ adding richness‚ but adjust sugar accordingly. Consistent temperature‚ like the Matador establishment’s opening hours (Dec 19‚ 2025)‚ yields predictable results.
The West Bend bread maker’s control panel is your command center for baking perfection. Familiarize yourself with each cycle: Basic‚ French‚ Whole Wheat‚ Dough‚ and Quick Bread – options mirroring the diverse events reported by West Seattle Blog (2025). The ‘Crust Color’ setting allows you to choose light‚ medium‚ or dark crusts‚ tailoring the loaf to your preference.
The ‘Delay Timer’ is incredibly useful for fresh bread in the morning! Simply set the desired delay‚ up to 13 hours‚ and enjoy. Remember‚ ingredients requiring refrigeration should be added last. Like the consistent updates from local news‚ understanding the panel ensures reliable results.

Each cycle on your West Bend bread maker is designed for specific bread types. The ‘Basic’ cycle is ideal for everyday loaves‚ while ‘French’ creates a crispier crust. ‘Whole Wheat’ extends kneading and rising times for denser flours. Use ‘Dough’ for recipes requiring manual shaping‚ like rolls – mirroring the community events highlighted by West Seattle Blog (2025).
‘Quick Bread’ is perfect for recipes without yeast‚ such as banana bread. The ‘Sweet’ cycle is optimized for enriched doughs. Experiment to find your favorites! Remember‚ cycle times vary; consult your recipe and the machine’s guide for optimal results‚ just like planning for local festivals.
Your West Bend bread maker offers adjustable crust color settings – typically Light‚ Medium‚ and Dark. ‘Light’ produces a pale‚ delicate crust‚ ideal for soft breads. ‘Medium’ delivers a balanced color and texture‚ suitable for most recipes. ‘Dark’ creates a robust‚ deeply browned crust‚ perfect for hearty loaves‚ much like the vibrant atmosphere of West Seattle’s summer events (2025).
Experiment to achieve your preferred level of crispness. Note that humidity and ingredient variations can affect results. Start with ‘Medium’ and adjust accordingly. Consistent use will help you determine the ideal setting for your favorite recipes‚ mirroring the reliable service of local businesses.
The delay timer allows you to conveniently schedule bread baking up to 13 hours in advance. This feature is perfect for enjoying fresh bread in the morning or having it ready after work‚ much like planning ahead for West Seattle’s festive open houses (December 19‚ 2025). Ensure perishable ingredients are added last and kept cool until the cycle begins.
To use‚ select your desired cycle‚ crust color‚ and then set the delay time. Press ‘Start’ and the machine will automatically begin baking at the programmed time. Avoid using the delay timer with quick bread recipes or those containing dairy products for extended periods‚ ensuring optimal freshness and quality.
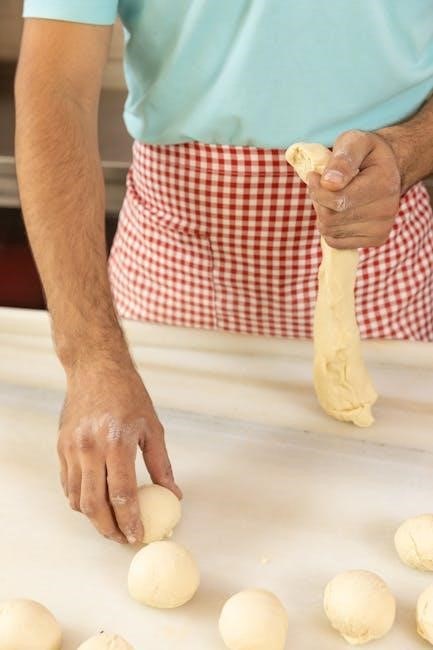
Begin by adding ingredients in the order specified in your recipe – typically liquids first‚ followed by dry ingredients‚ and finally yeast. This ensures proper activation‚ similar to the community events happening in West Seattle (November 8‚ 2025). Select your desired cycle (basic‚ whole wheat‚ etc.) and crust color. Press ‘Start’ to initiate the kneading process.
Monitor the kneading; the dough should form a smooth‚ elastic ball. Avoid opening the lid during baking unless absolutely necessary. A finished loaf will release easily from the pan and sound hollow when tapped‚ much like the excitement surrounding West Seattle Summer Fest (July 9‚ 2025).
For optimal results‚ always adhere to the recommended ingredient order: liquids first‚ then dry ingredients‚ and finally yeast. This layering technique‚ much like the preparations for West Seattle’s holiday open houses (July 17‚ 2025)‚ ensures proper hydration and activation. Adding yeast directly on top of liquid can hinder its performance.
The West Bend bread maker’s design relies on this sequence for consistent kneading and rising. Think of it as building layers‚ similar to the various vendors at West Seattle Summer Fest (July 9‚ 2025). Incorrect order can lead to uneven mixing or a loaf that doesn’t rise properly‚ impacting the final texture.
Observe the dough during the kneading cycle through the viewing window. Initially‚ it will appear shaggy‚ resembling the crowds at St. John the Baptist Church (November 8‚ 2025). As kneading progresses‚ it should form a smooth‚ elastic ball‚ similar to the well-organized displays at CAPERS’ holiday sale (November 8‚ 2025).
If the dough is too dry‚ add liquid‚ one tablespoon at a time. Conversely‚ if it’s too sticky‚ add flour‚ also one tablespoon at a time. This adjustment mirrors the careful planning needed for events like the West Seattle Brake Service sale (June 14‚ 2025). Excessive stickiness can cause issues‚ much like a utility pole incident (December 3‚ 2025).
The bread maker will signal completion with a beep‚ much like the announcement of the West Seattle Summer Fest (July 9‚ 2025). However‚ always verify doneness. Gently shake the pan; the loaf should sound hollow. A sunset view from Alki Point (May 17‚ 2025) is beautiful‚ but don’t rely on aesthetics for baking!
Use a wooden skewer or toothpick inserted into the center – it should come out clean. If it’s still doughy‚ select the “bake” cycle for an additional 5-10 minutes. Avoid opening the lid frequently‚ as this releases heat‚ similar to leaving a door open during a cold snap. Remember Matador’s opening hours (December 19‚ 2025) – timing is key!
Encountering problems? Don’t despair! If your bread doesn’t rise‚ check your yeast – ensure it’s fresh and activated properly‚ like the bustling crowd at St. John the Baptist Church (November 8‚ 2025). Dense bread often indicates too much liquid or insufficient kneading. A burned crust or collapsed loaf suggests excessive heat or an incorrect cycle selection.
Refer to the cycle selection guide for optimal settings. If a utility pole is hit (November 3‚ 2025)‚ investigate the cause! Ensure ingredients are measured accurately‚ mirroring the precision of CAPERS’ inventory (November 8‚ 2025). Consistent issues may require contacting customer support.
A loaf that fails to rise is a common frustration. First‚ verify your yeast’s viability – old yeast‚ like a business closing (West Seattle Brake Service‚ June 14‚ 2025)‚ won’t perform. Ensure proper activation; lukewarm liquid is crucial. Check the ambient temperature; cold environments hinder rising‚ similar to a calm December evening (December 15‚ 2025).

Over-proofing can also cause collapse. Too much salt inhibits yeast activity. Confirm you’ve selected the correct cycle. A crowded hall (St. John the Baptist‚ November 8‚ 2025) needs space‚ and so does your dough! Finally‚ ensure the lid is securely fastened during the rising phase.
A dense loaf often signals an imbalance in ingredients. Insufficient yeast‚ much like a sparsely attended event (compared to the crowded hall‚ November 8‚ 2025)‚ won’t provide adequate lift. Too much flour‚ or not enough liquid‚ creates a stiff dough. Accurate measurements‚ especially liquid temperature (lukewarm‚ not hot!)‚ are vital.
Consider the flour type; whole wheat requires more liquid. Ensure thorough kneading – a short cycle won’t develop sufficient gluten. Avoid interrupting the cycle mid-knead. A spectacular sunset (May 17‚ 2025) needs time to unfold‚ and so does gluten development. Finally‚ check your yeast’s expiration date!
A burned crust usually indicates excessive heat or a prolonged baking cycle. Select a lighter crust color setting. A collapsed loaf often results from too much yeast‚ causing rapid expansion followed by structural failure – similar to a quickly built structure (like the Matador establishment‚ December 19‚ 2025).
Over-proofing can also cause collapse. Ensure ingredients are added in the correct order‚ and avoid opening the lid during baking. Check the heating element for debris. If the loaf consistently collapses‚ reduce the yeast slightly. Remember‚ even a beautiful sunset (December 15‚ 2025) can fade if not properly timed;
Elevate your baking with exciting additions! Incorporate fruits‚ nuts‚ and seeds during the signal beep‚ ensuring even distribution – much like the diverse vendors at West Seattle Summer Fest (July 9‚ 2025). For gluten-free bread‚ utilize a dedicated gluten-free flour blend and consider adding a binding agent like xanthan gum.
The bread maker also excels at dough preparation for rolls and pizza. Select the “Dough” cycle‚ then shape and bake as desired. Remember CAPERS’ open house (November 8‚ 2025) showcased variety; similarly‚ experiment with flavors! Adjust liquid levels for optimal dough consistency‚ and always monitor the kneading process.
Enhance your loaves with delightful textures and flavors! Add dried fruits‚ chopped nuts‚ or seeds during the second kneading cycle‚ typically signaled by an audible beep. This ensures even distribution throughout the bread‚ preventing them from sinking to the bottom – similar to the diverse offerings at the West Seattle Summer Fest (July 9‚ 2025).
Generally‚ use between ½ to 1 cup of additions per standard loaf recipe. Pre-chopping larger fruits or nuts is recommended. Consider soaking dried fruits in warm water for 10 minutes to plump them up. Remember‚ like the Matador establishment (Dec 19‚ 2025)‚ balance is key!
Baking gluten-free bread requires a specialized approach. Utilize a gluten-free flour blend specifically designed for bread machines‚ as these often contain xanthan gum‚ crucial for structure – much like the cornerstone businesses in West Seattle Junction (July 9‚ 2025). Reduce the liquid slightly‚ starting with 1 tablespoon less‚ as gluten-free flours absorb moisture differently.
Select the “Gluten-Free” cycle if your West Bend model has one. Otherwise‚ use the “Basic” cycle. Monitor the dough closely; it will be stickier than traditional dough. Avoid overmixing. Remember the West Seattle Brake Service sale (June 14‚ 2025) – precision matters!
Your West Bend bread maker isn’t just for loaves! Utilize the “Dough” cycle for perfect pizza or roll dough. Begin with a standard bread recipe‚ reducing yeast by approximately ¼ teaspoon. This prevents over-proofing during the cycle‚ mirroring the careful planning of the West Seattle Summer Fest (July 9‚ 2025).
Once the dough cycle completes‚ remove the dough and proceed with your favorite roll or pizza recipe. Remember to lightly flour your work surface. Like the Matador establishment accommodating younger patrons (Dec 19‚ 2025)‚ adapt to the specific needs of your creation!
Maintaining your West Bend bread maker ensures longevity and optimal performance. After each use‚ unplug the machine and allow all components to cool completely. The bread pan and kneading paddle are typically non-stick and can be hand-washed with warm‚ soapy water – similar to the care given to businesses like CAPERS (Nov 8‚ 2025).
Avoid abrasive cleaners or scouring pads that could damage the non-stick coating. For a deep clean‚ wipe down the exterior with a damp cloth. Regular maintenance‚ like the West Seattle Brake Service sale (June 14‚ 2025)‚ prevents larger issues. Store your bread maker in a cool‚ dry place.
Following each baking cycle‚ promptly unplug your West Bend bread maker for safety. Once cooled‚ carefully remove the bread pan and kneading paddle. Hand wash these components with warm‚ soapy water‚ avoiding harsh abrasives – much like maintaining a local business in West Seattle (Nov 3‚ 2025).
Rinse thoroughly and dry completely before reassembling. Wipe down the exterior of the machine with a damp cloth to remove any flour residue. This simple routine‚ akin to the West Seattle Summer Fest’s upkeep (July 9‚ 2025)‚ prevents buildup and ensures hygienic operation. Don’t forget to check for crumbs in the heating element area!
For optimal performance‚ perform a deep clean of your West Bend bread maker monthly‚ or more frequently with heavy use. Unplug the machine and remove all detachable parts – bread pan‚ kneading paddle‚ and any included measuring tools. Wash these thoroughly‚ similar to CAPERS’ yearly holiday open house cleaning (Nov 8‚ 2025).
Inspect the inside of the bread maker for any accumulated crumbs or residue‚ carefully removing them with a soft brush or cloth. Wipe down the heating element with a slightly damp cloth‚ ensuring it’s completely dry before reassembly. This detailed cleaning‚ like the West Seattle Brake Service sale preparation (June 14‚ 2025)‚ extends the life of your appliance.
To preserve your West Bend bread maker’s longevity‚ proper storage is crucial; Before storing‚ ensure the appliance is completely cool and dry‚ mirroring the care taken during the 4040 House Crew event (Dec 15‚ 2025). Clean all removable parts thoroughly‚ as detailed in the deep cleaning schedule‚ preventing mold or odors.
Store the bread maker in a cool‚ dry place‚ away from direct sunlight and extreme temperatures. Consider covering it with a dust cloth‚ similar to protecting items during the West Seattle Summer Fest (July 9‚ 2025). Avoid stacking heavy objects on top‚ and keep the power cord neatly coiled to prevent damage‚ ensuring it’s ready for your next baking adventure.
Always prioritize safety when operating your West Bend bread maker. Ensure the appliance is plugged into a grounded outlet‚ avoiding any electrical hazards‚ much like the care needed near the utility pole incident (Nov 3‚ 2025). Never immerse the appliance base in water or other liquids.
Be cautious of hot surfaces during and immediately after baking‚ preventing burns and injuries. Allow the bread maker to cool completely before cleaning or storing‚ similar to the precautions during the West Seattle Brake Service Sale (June 14‚ 2025). Ensure adequate ventilation around the appliance during operation‚ and never leave it unattended while running.
To ensure safe operation‚ always verify your West Bend bread maker is connected to a properly grounded 120V AC outlet. Avoid using extension cords if possible; if necessary‚ use a heavy-duty cord rated for the appliance’s wattage. Never operate the bread maker with a damaged cord or plug‚ mirroring the caution needed around downed power lines (Nov 3‚ 2025).
Do not attempt to repair the appliance yourself. Contact qualified service personnel for any electrical issues. Keep the appliance away from water and other liquids to prevent electric shock. Disconnect the bread maker from the outlet when not in use and before cleaning‚ similar to closing a business like West Seattle Brake Service (June 14‚ 2025).
Exercise extreme caution when handling the bread pan and freshly baked bread‚ as they will be very hot. Always use oven mitts or pot holders to prevent burns‚ remembering the potential hazards like a vehicle impacting a utility pole (Dec 3‚ 2025). Never touch the heating element inside the bread maker while it’s in operation or immediately after use.
Keep children and pets away from the bread maker during operation. Do not attempt to open the lid during the baking cycle‚ as escaping steam can cause severe burns. Ensure the appliance is placed on a stable‚ heat-resistant surface. Handle the appliance with care‚ avoiding any forceful impacts‚ similar to protecting a business during a sale (June 14‚ 2025).
Ensure adequate ventilation around your West Bend bread maker during operation. The baking process releases steam‚ and in some cases‚ odors. Position the appliance with sufficient space on all sides – at least six inches – to allow for proper airflow‚ much like ensuring clear views during a sunset observation (May 17‚ 2025).
Avoid placing the bread maker in a confined space or directly under cabinets‚ as this can trap heat and moisture. Do not obstruct the ventilation openings on the appliance. Proper ventilation helps prevent condensation buildup and ensures efficient operation. A well-ventilated area also minimizes any potential odors from escaping‚ contributing to a more pleasant baking experience‚ similar to a festive open house (July 9‚ 2025).